How can you use animation?
Concept presentation
When designing websites or applications, we often incorporate animations to make a great first impression. Websites with animation are becoming increasingly popular, and there are many web animation examples and animation trends to follow. We love using animation to bring our UI to life and showcase all the features before even starting the coding process.
Bring illustrations to live
We strive to create unique animated websites that captivate and engage users. Sometimes we keep animations on the website or application simple but spend time bringing illustrations to life. Animated illustrations, even the smallest, really make a big difference.
Simplify implementation
Motion design always helps to implement your creative design faster. How? Firstly, you can animate a website or an app to show developers how it should work. You can animate all parts of the design or just some transitions/reveals that are not standard. Secondly, if you animated illustrations in After Effects, you can export them into Lottie files format. That way they will be implemented quickly and it will save developers a lot of time.
Learn more about Top Principles How to Design Lottie Animations for your Website or App
Improve your portfolio
Static design presentations are great, but let’s be honest — people love videos. They are simple, impressive, engaging, and entertaining to watch. If you are a motion designer, you can create loads of cool animations: play with parallax effects, include 3d animations in UI, play around with distortion effects on photos, animate illustrations, etc.
If you’re a UI/UX designer, even simple scroll and reveals will help to bring more attention to your design and make your portfolio outstanding.
Work with the design source
Import from Sketch
Importing from Sketch is much easier. You also will need AEUX plugin for After Effects and Sketch.
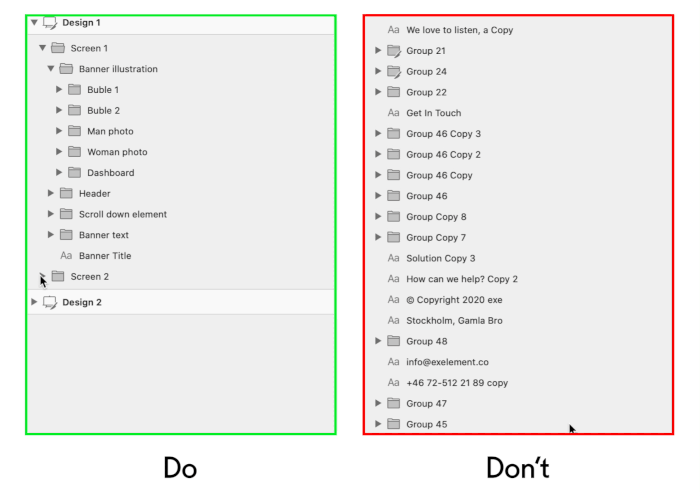
1. Organize your source in groups and name all the layers properly.
2. Adjust settings for import in the AE plugin. In plugin settings, you can choose where to import sources — new or existed composition. Also, plugin can: precompose groups, auto-build artboards, change frame rate and size of the composition, etc. (you can read the detailed information about the settings here).
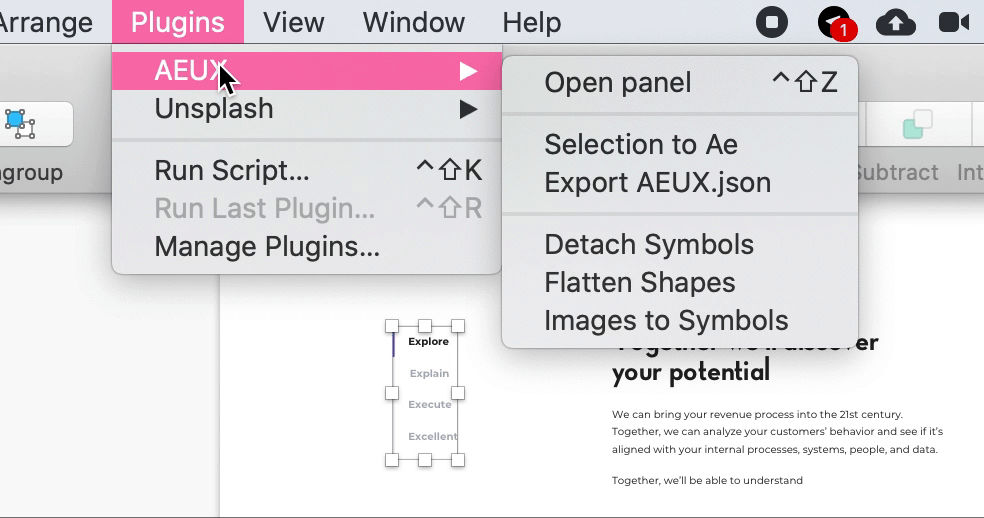
3. Go to the plugins panel, choose AEUX, and click “send to AE”. In the latest version of the plugin, a source from Sketch will open automatically in After Effects.
Import from Figma
In that process, you will need the help of the AEUX plugin for After Effects and the online Figma plugin.
After installing (instructions here):
1. Make sure that you downloaded the fonts used in the design.

2. Check that all the layers are named properly. It’s very important because if not, you will spend a ton of time organizing everything in After Effects.
3. Adjust settings for import in After Effects as you did in Sketch.
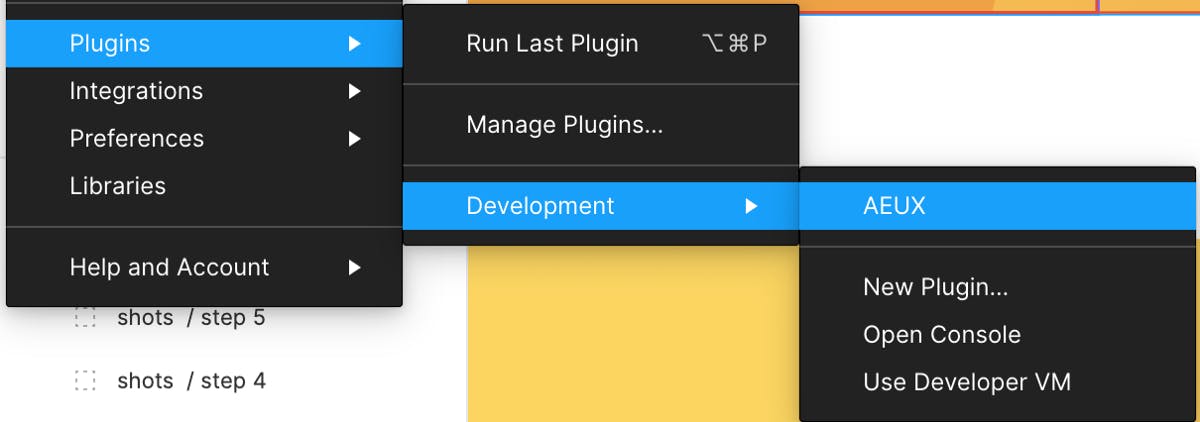
4. Go to the plugins panel, development, and choose AEUX. Adjust settings if needed and click “send to AE”. In the latest version of the plugin, a source from Figma will open automatically in After Effects.
Animation process
Prepare After Effect source
Precomposes
As we know, there’re two types of people:
1. Love precomposes and use them all the time;
2. Prefer not to use precomposes.
We use them only for organizing not animated or only slightly animated parts of the design: header, footer, cards, and toolbars.
Why? You often lose flexibility in the animation process. For example, if you need to animate the scroll and you have animations of the screen parts in precomposes when adjusting timing, you will go back and forth in compositions, which is quite time-consuming.
Also, some layer effects may not work properly if you made an animation in precompose (CC bend, 3d layers, etc).
Color organization and parenting
If you don’t use precomposes, you still need to organize layers somehow.
We always use color code to spread layers into groups and NULL objects, which helps us to animate and find layers faster.
As you animate, change the color for all the layers of each animated screen (like on the left image) or color code parts of the screen (like on the right image). For example, we have a screen with a Title and then 3 columns with content. The first option is to apply the same color to all the screen elements, and the second — apply a unique color to each column. Then Create NULL objects and parent all the layers of the screen to that NULL.
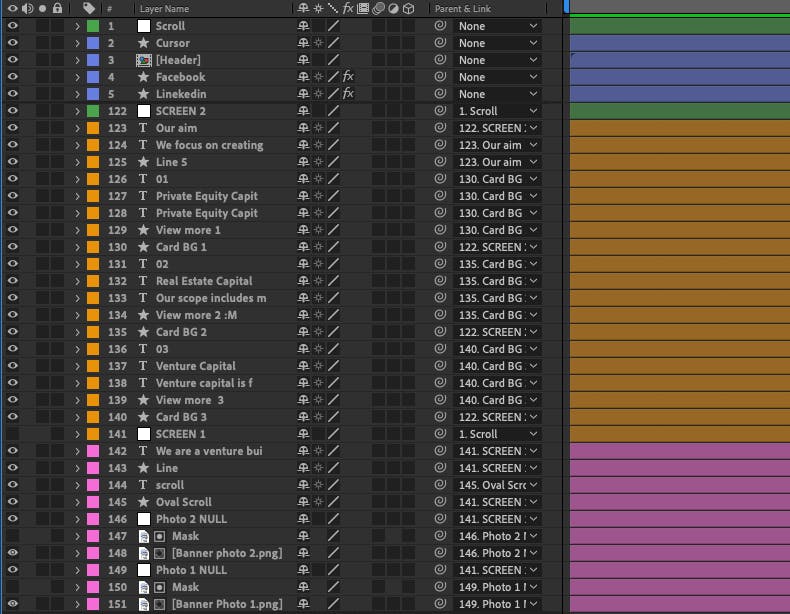
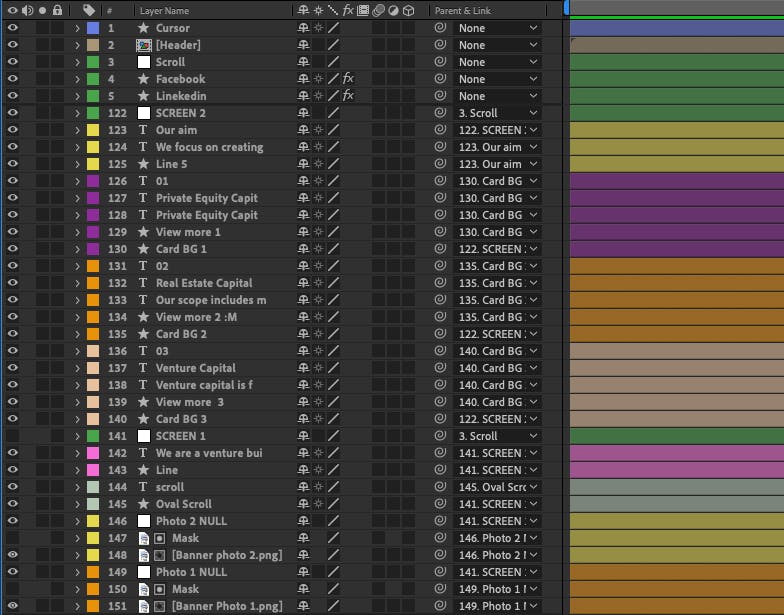 Color coding and parenting
Animation tips
Finally, you’re ready to animate. We won’t teach you how to animate basic properties but we’ll give you some animation tips we learned ourselves.
Essential Free plugins to simplify your work
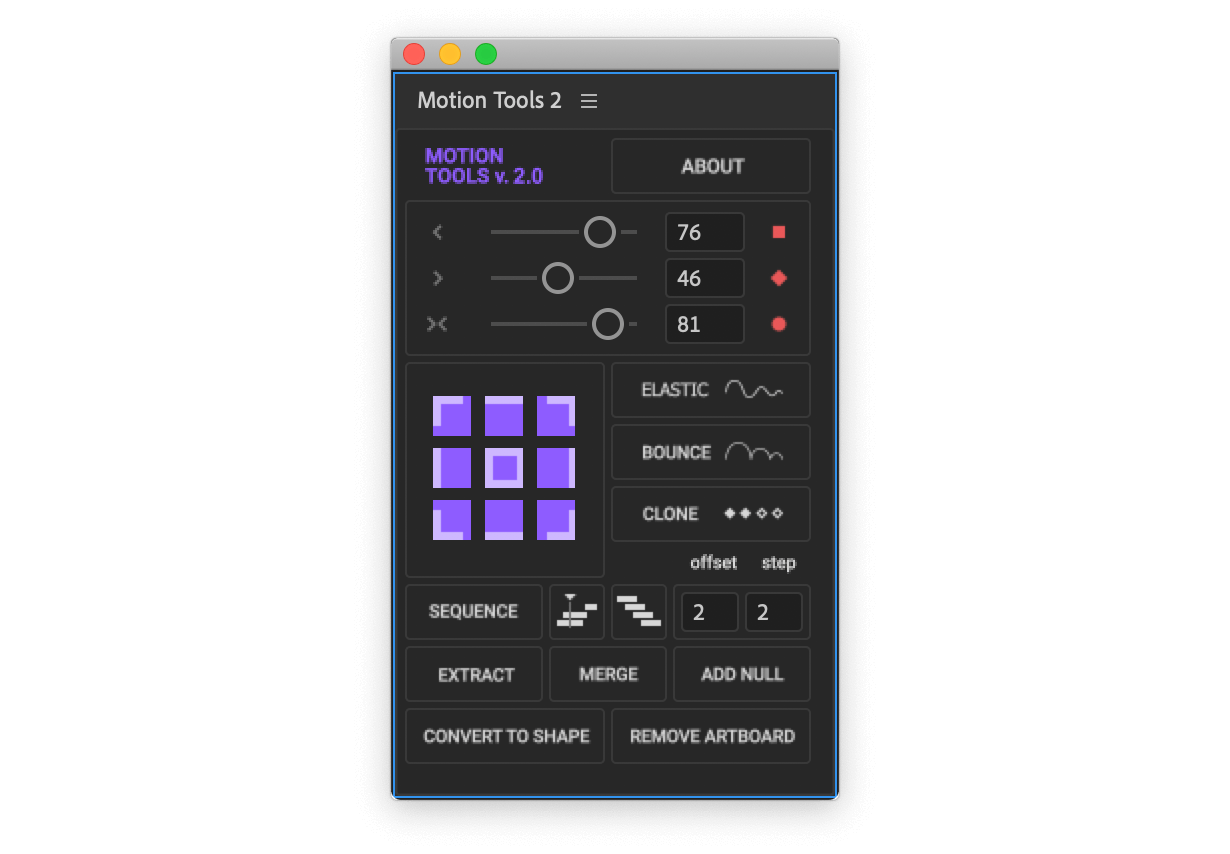 Motion Tools plugin in After Effects.
Motion tools
We can’t imagine even a day animating without this plugin. It helps to optimize your workflow and saves plenty of time.
All instructions about how to use it are in this video.
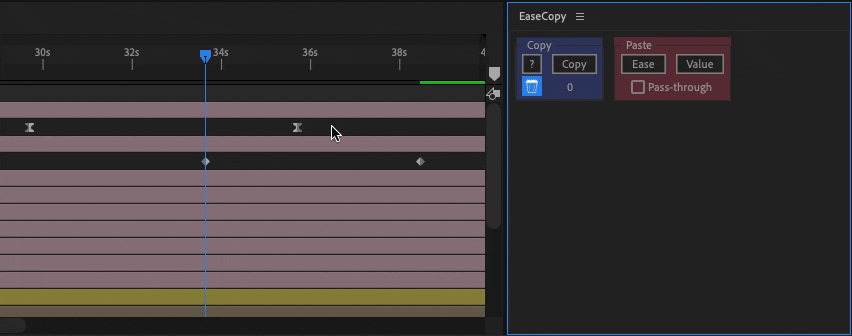
Easy copy
That’s another simple but handy plugin. It has only one simple function — copying your easing from one keyframe to the other. How to use it? Just select keyframes when you already adjusted easing, press “copy”, select the keyframes on which you need the same easing, and press “paste”.
Bodymovin and lottie files
We use plugins to export our illustration, preloader, and icon animations.
Those plugins convert After Effects compositions to JSON format files that can be used on iOS, Android, web, and React Native without modification.
You can get more information about those plugins and Lottie animations from our article Top Principles How to Design Lottie Animations.
Easings
Good easing is the most important thing in animation! Without it you can’t create good animated website. It’s key to everything and we will teach you how to do good easings.
While creating UI animations you will be animating 2 things all the time: scrolls and reveals.
To animate them, you will use standard properties: position, opacity, scale, and rotation.
For example, you’re animating a scroll. All your layers are ready and organized. You’ve already created NULL for scroll and parented layers to it (we talked about creating NULLs for each screen. Now you need to parent them to scroll NULL). Good, it’s time to do the magic.
- Tap on scroll NULL and activate the Position property (press “P” on the keyboard).
- Tap on scroll NULL and activate the Position property (press “P” on the keyboard).
- Go back to the timeline and adjust the time if needed.
Common mistake! When you finally did that perfect scroll, you try to use the same timing everywhere. Sad news — it’s not gonna work like that. In most cases, you don’t need to adjust the curve form but need to change the timing of the scroll animation.
Reveals
Now it’s time to talk about animation reveals of the objects. You’ve already animated scroll movement but it’s not enough. To make a good-looking motion you will need to animate reveals of the layers you’re scrolling to.
How to animate reveals?
- Select layers, and press “P” and “T” on the keyboard to choose position and opacity properties.
- Select layers, and press “P” and “T” on the keyboard to choose position and opacity properties.
- Create easings as you see on the graph below.
Preview the animation and you will see that all the movements look much smoother now.
Offsets
So you’ve animated scroll movement, reveals and added easings but something is still missing… Offsets! They always make a big difference.
What does “Offsets” mean?
It means that animation isn’t simultaneous. For example, the animation of every next layer will start 2 frames later than the animation of the previous layer.
- Create offsets — move every layer by 2 frames further (move each layer keyframes one by one or use MDS plugin to do it in one click).
Watch the animation sample for easy understanding. - Preview and adjust animation if needed. You will see a big difference now. So don’t forget to use offsets in your animation. It always helps!
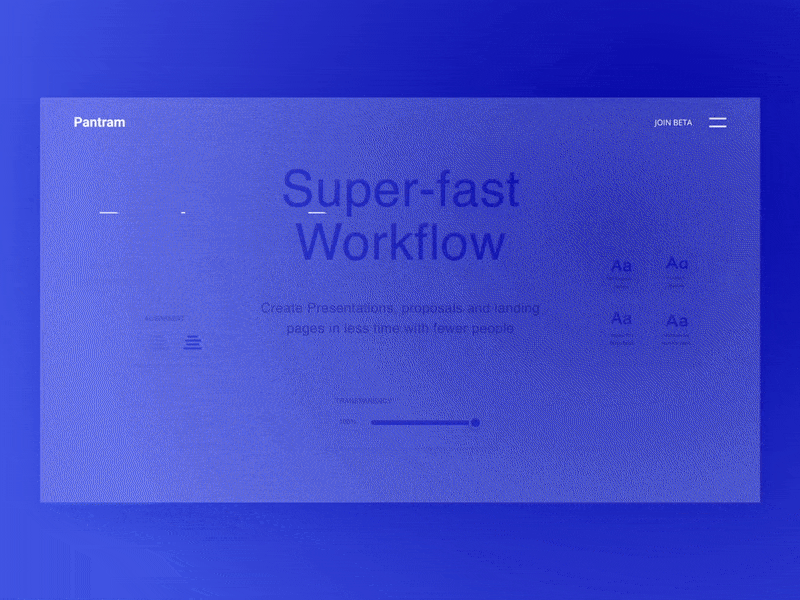
Photo animation
When you mastered basic animation it’s time to get more creative. You can use simple but good-looking animations.
Photo reveals
Add masks, scale, rotation, or even distortion to your photo reveals and it will instantly make a difference.
For example, here you can see added scale animation and mask to reveal. It’s really simple to animate but looks much better than the standard reveal by opacity.
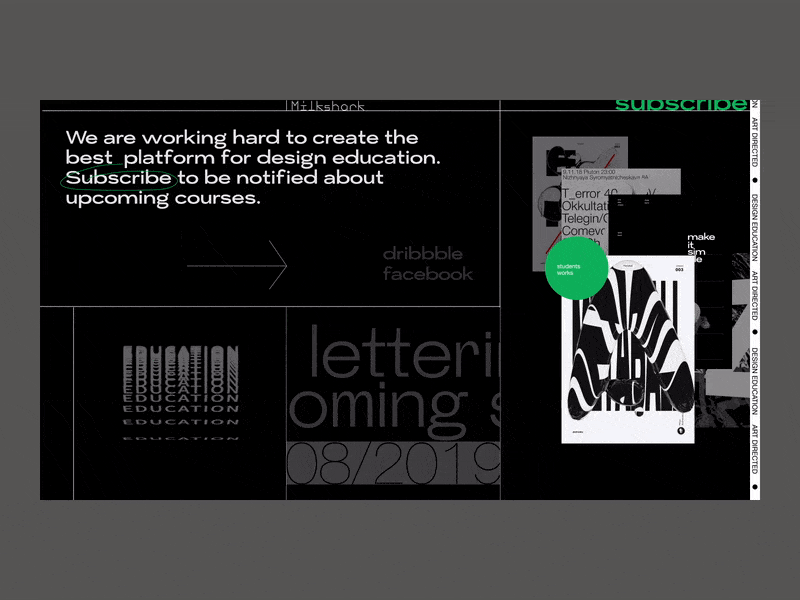
 Photo effects animations
Photo effects
Apart from reveals, you can add distortion effects to the photos that will appear by hover or even will be visible all the time.
Creating distortions is quite a complex and sometimes complicated process, but you can use our ready presets which are coming soon. Here is a small sneak peek of them and a good example of how photo effects can look on websites.
Text animation
Most of the time we use simple animations for text, but sometimes you will want to add some interesting details to basic animations.
 Text animation examples on website
Text effects animation is easy to learn. If you type “text animation in After Effects” on youtube, you will see a lot of tutorials. But if you don’t want to spend your time learning text animation, we can help you. Our ready text presets will be available for downloading soon. They can be used for both the titles and main text animations. We even prepared kinetic typography animations that you can use as a graphic element.
Take a look at how text animations can help to create an impressive videos.
Illustrations animation
Bring your illustrations to life and your app or website design 100% will become more impressive.
We always animate illustrations for websites and apps. It’s fast, easy, and simple to implement but make website more interesting and live.
When animation is complete, developers will need JSON format files. To create them we use Bodymovin plugin or Lottie files plugin for After Effects. Most of the time effects won’t work in Lottie format so we try to create nice animation with basic properties: position, rotation, scale, opacity, and path animation.
You can find more information about why you should use Lottie and how to use them in our article Top principles of how to create Lottie animations. And if you need some cool illustrations to animate you can find it on ITG.Digital.
Check when you finished animating
When you’ve completed creating, check a couple of things:
- Preview complete animation (in AE) many times. Not just once — at least five times. Check that everything looks as you wanted.
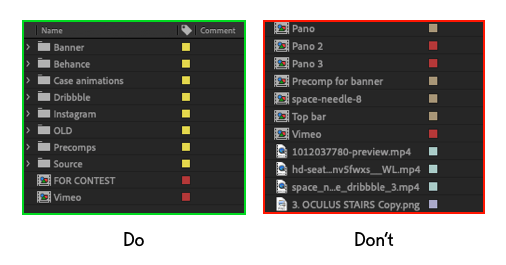
2. Make everything look pretty in the project panel. All sources in separate folders. Precomposes properly named and collected together in one folder. Create a folder “Archive” and keep all versions of animations here (Just trust us on that one).
3. Render and check rendered animation again. Be patient and check it at least 5 times, you are likely to find some bugs there.
Tips for social media posting and rendering
If you are new to all that animation stuff, we have some tips for you.
Rendering
Use Adobe Media Encoder. Yes, you can render .mov straight in After Effects, but it’s not the best format. MOV weighs a lot and sometimes it won’t play correctly on the web. Of course, you can render in MOV and then use online converters to render in MP4 or GIF format but
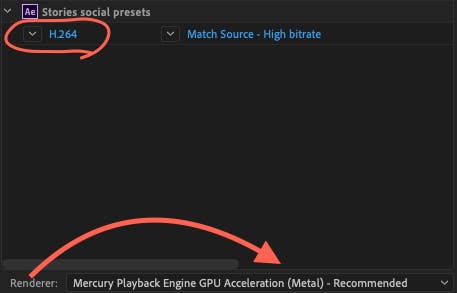
In Media Encoder render in h.264. Most often standard settings will be enough for you. If you need, you can change the frame rate or size of the video here without going back to AE. Just check that your render is set to “Mercury Playback Engine GPU Acceleration (Metal)”.
Sometimes you will need to optimize your video so it weighs less. To do that we recommend HandBrake application. It’s very easy and intuitive to use. Here you can reduce the file of the video, optimize for Web, and change the size, bitrate, or framerate.
Social media tips
First and most important — thumbnail. The most common mistake is forgetting about a good thumbnail. As a result, you might have an empty or unattractive thumbnail which will mess up all the work you’ve done.
The second thing to work on — looped animation. It’s something that makes the animation look nicer and smoother. Especially in dribble shots, it’s good for the animation to be looped.
If you want to take a closer look at thumbnails and animation cycles, here is our portfolio on Dribbble.
Conclusions
- Remember to take one step at a time. If you’re a beginner, just start with simple reveals. Master easings and timing, and only after that move to more complex animations.
- Remember to take one step at a time. If you’re a beginner, just start with simple reveals. Master easings and timing, and only after that move to more complex animations.
- Keep your source clean! You will be thankful to yourself for this later.
Animation is concentration. So take your time and focus on quality rather than on quantity.
Here you can find more examples of cool animated websites:
- Olha Uzhykova portfolio website — good example of interactive animations.
- OrCad — an enterprise website design built with Webflow. (You can find more details about design process in this article How to effectively implement 3D animation on a website. and, of course check our Case Study)